Specialized Saddles – Quick Start Guide
Watch our setup video – below the video are specific instructions for each step. You can also download our quick start guide PDF here. If you need to make adjustments after intitial set up, click here for our video on further adjustments. Visit our Video Learning Center for other videos specific to your needs.
Quick Start Video Guide
Step One – Width Adjustment

To begin fitting a horse using the Specialized Saddle 3-D fit system we start at the shoulders to adjust the width. Remember horses are 3 dimensional and the Specialized Saddles patented 3-D fitting system is the only system in which you can adjust the saddle to fit all dimensions of your horse: width, arch, and angle. With a 4” range of width adjustment you can easily fit both wide and narrow horses.
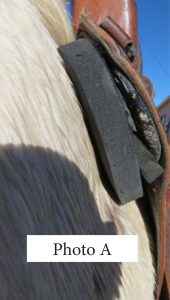
To adjust width simply move the fitting cushions down slightly in ¼” increments in the front for more width. To make larger adjustments select thinner cushions to make your saddle wider, or thicker cushions to make it narrower. Adjust to achieve a ¼” gap at the front of the fitting cushion. Refer to Photo A on the left
Step Two – Angle Adjustment

Now examine the ¼” gap at the bottom of the bars in the front of the saddle. Make sure it is the same at both the top and the bottom, thus parallel. To adjust this angle to get the gap parallel simply select a 4” long piece of wedge shim with an angle corresponding to the gap you are trying to fill. These wedge shims come in three angles. Note wedge at bottom in picture A used to get parallel angle to the shoulder.
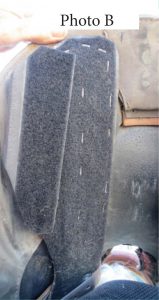
Now check the gap between the fitting cushion pressed to the horse and the lower edge of the bar behind your leg. Again select the wedge shim that corresponds to the gap you are trying to fill. Be careful to only install wedge shims on bottom half of bars NOT in the center. Refer to Photo B on the right.

Step Three – Arch
Now you have adjusted both width and angle and you are ready to check the third dimension, the rock or dip. Look under the pommel at the entire top edge of the fitting cushions for any gap between the horses back and the fitting cushions. You will want to apply some pressure to the seat with your hand while examining this area. You can often remove this gap simply by adjusting the width wider. (see step one)
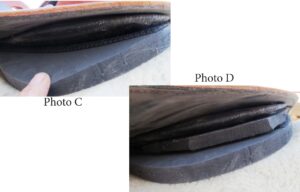
You can also add flat shims in layers to fill any gaps here in the middle. Be sure not to over shim here. The fitting cushions will compress and mold with time to fit your horses back and slight imperfections in the fit will be eliminated by this molding.
If you need further adjustments or need to adjust your setup the below video will help.