How Our Virtual Fit Program Works
Specialized Saddles are designed to be adjustable to your horse as they change over time. Our patented 3-D fitting system allows us to independently adjust width, angle, and arch for a more precise fit than traditional saddles.
Through our Photo Fit and Virtual Fit programs, our team can evaluate your saddle balance and help recommend fitting cushion or shim adjustments to improve comfort for both horse and rider.
Our Photo Fit program is the first step in evaluating saddle fit and balance for both horse and rider. Through detailed photos and information, we are often able to make fitting recommendations and shim adjustments without needing a live appointment.
If additional help is needed after your Photo Fit evaluation, we may recommend scheduling a Virtual Fit consultation.
Our Virtual Fit Process
Our Virtual Fit process begins with a Photo Fit evaluation using detailed saddle fit photos. In many cases, we are able to make fitting recommendations through photos alone.
If additional assistance is needed, we may recommend a Virtual Fit consultation where we can work directly with you to evaluate saddle balance, shim placement, rider position, and horse movement in real time.
This process allows us to continue supporting both horse and rider long after the original saddle purchase.
Our fitting system has helped thousands of endurance, trail, gaited, and western riders improve horse comfort over distances ranging from everyday trail riding to 100-mile endurance competition.
Saddle Support Policy
Purchased directly from Specialized Saddles?
You receive lifetime Photo Fit and Virtual Fit support at no additional charge.
Purchased your saddle used?
A Photo Fit evaluation purchase is required before photos can be reviewed.
For used saddle evaluations, the Photo Fit purchase includes up to 30 minutes of Virtual Fit consultation time if additional assistance is needed. Additional Virtual Fit consultation time beyond the included 30 minutes is billed at $50 per 30 minutes.
What Happens After You Send Your Photos?
- Our fitting team reviews your images.
- We evaluate saddle position, balance, width, angle, and pressure points.
- We provide recommendations for shim placement or fitting adjustments.
- If additional help is needed, a Virtual Fit session may be recommended.
Common Issues We Evaluate
- Saddle sliding backward
- Bridging
- Shoulder restriction
- Dry spots or rub marks
- Hollowing or soreness
- Rider tipping forward or backward
- Uneven pressure
- Gait restriction
Before Taking Your Photos
When sending in your Photo Fit pictures, be sure to include:
- What saddle pad you are using
- The issues you are experiencing, including behavioral issues from your horse, rub spots, soreness, and/or rider issues
- How long this has been occurring
- Name of the saddle fitter you are working with, or the person who originally fit the saddle
- Breed and age of horse
- Type of riding and frequency
- Your Photo Fit order number or original saddle purchase order number
Photo Fits will not be evaluated without either a Photo Fit order number or the original saddle purchase order number.
Typical Photo Fit response time:
3–5 business days depending on seasonal volume.
Photo Submission Instructions
These exact 8 pictures give us the information needed to advise you on how to improve your saddle fit. You will need an assistant to help take these photos correctly. Make sure your horse stands square, with the front feet side by side for even shoulder placement. Please number the photos as indicated in the instructions.
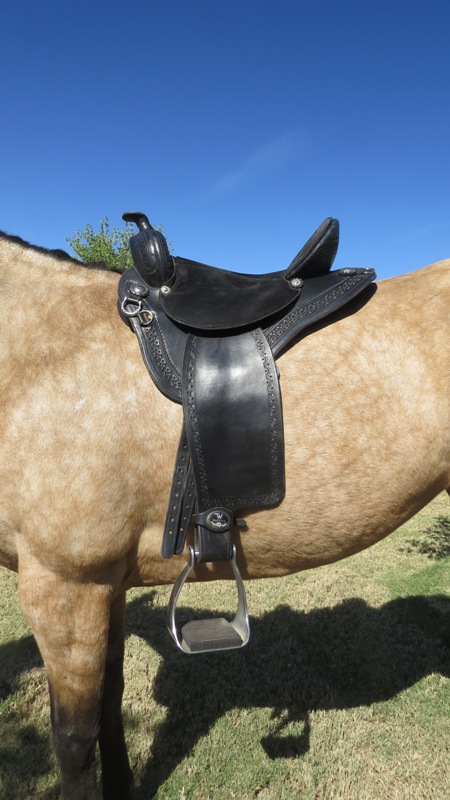
Photo 1 — Saddle Placement
Set saddle on horse as shown. The front of the bar, not the leather or skirting, should be in a vertical line with the crease of the elbow.
Photos 2 & 3 — Front Photo Fit
Take a photo of the left side and the right side, approximately 10 to 12 inches away. We need to see the gap at the front edge of the fitting cushions. You can use direct sunlight or flash in shade if possible. Be conscious of shadows so they do not obscure the subject area.
Photo 2
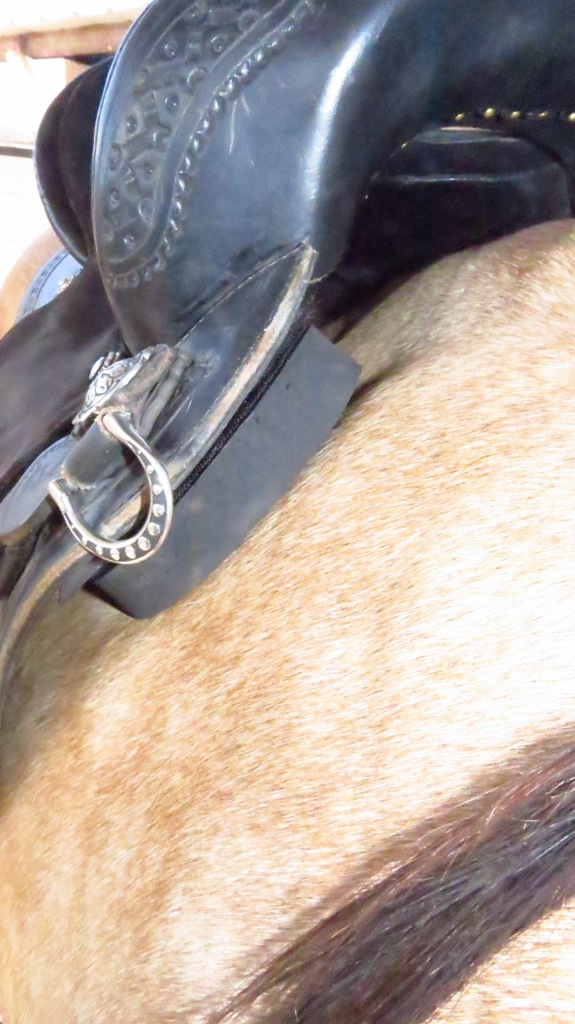
Photo 3
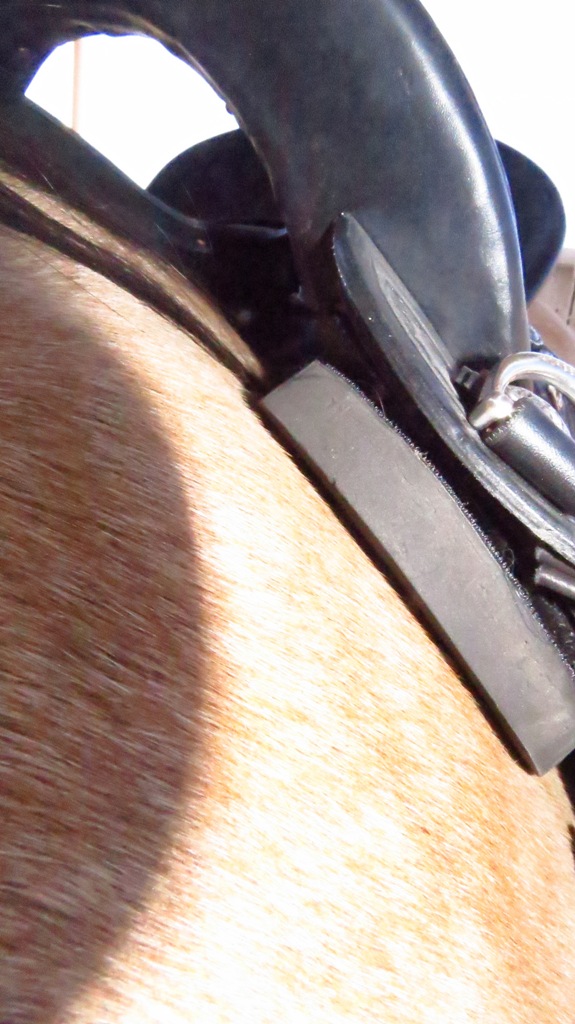
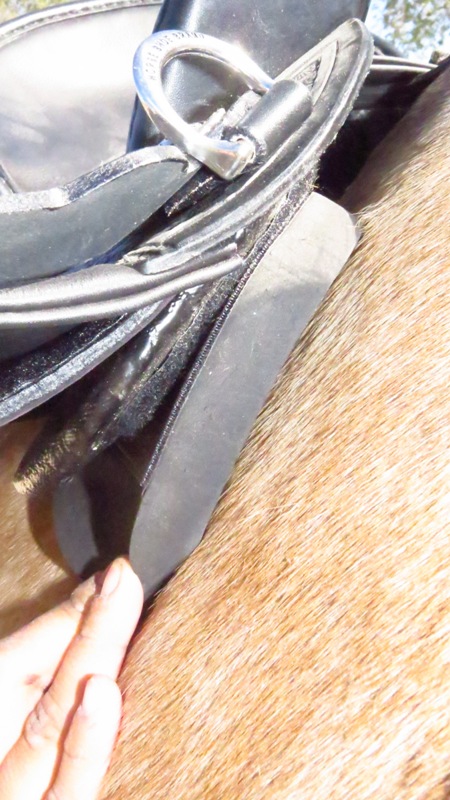
Photos 4 & 5 — Front Bar Gap
Have an assistant push the lower edge of the fitting cushion to the horse to show the gap on the left and right side.
Photo 4
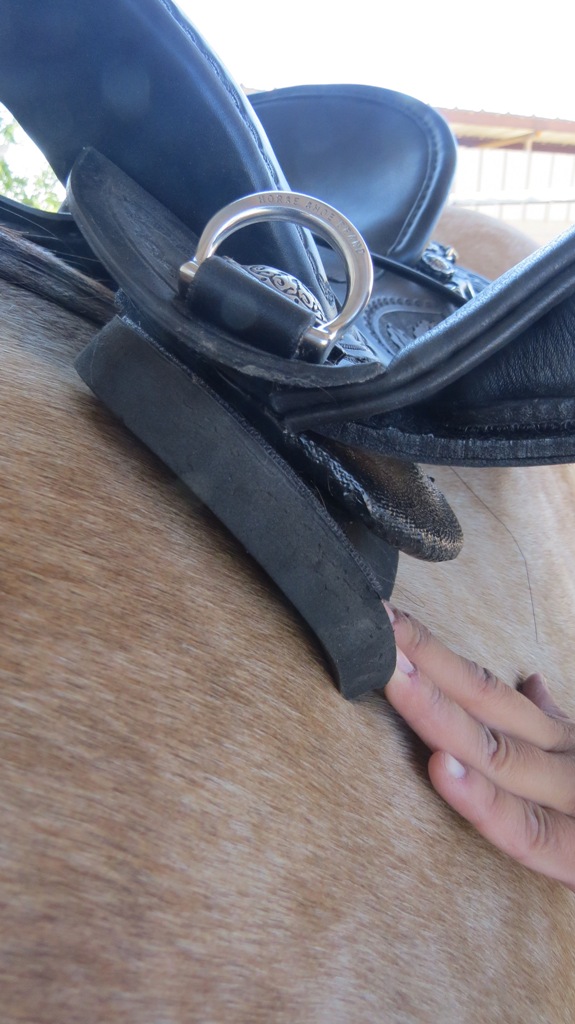
Photo 5
Photos 6 & 7 — Rear Photo Fit
Take a photo of each side. If the saddle has a shim, leave it where it is.
Photo 6

Photo 7
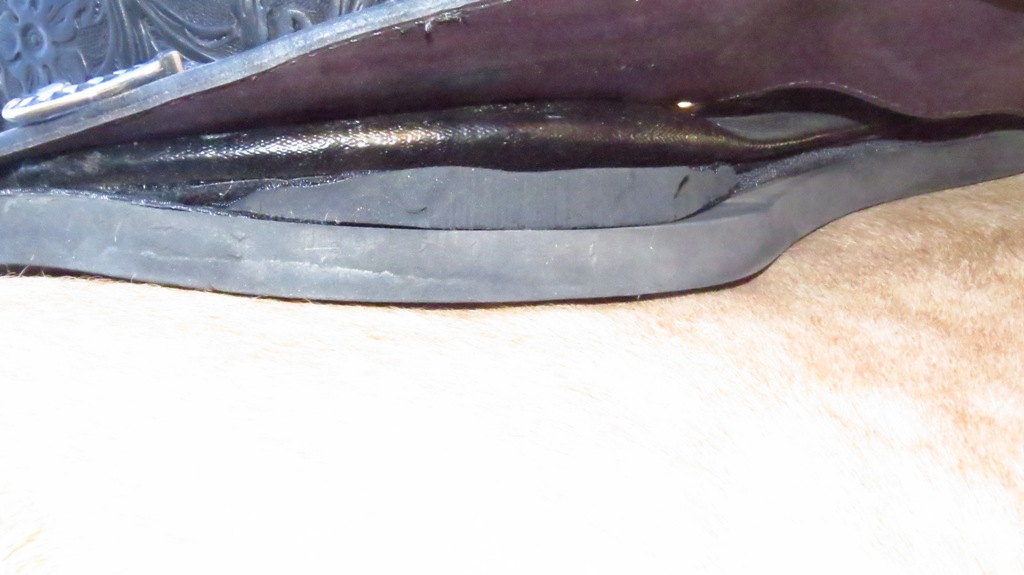
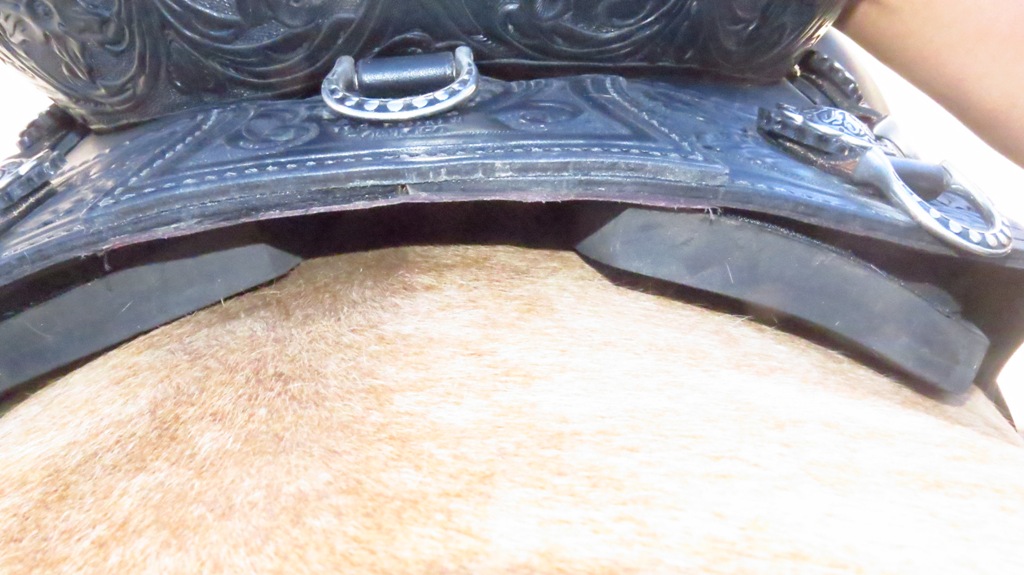
Photo 8 — Top Rear View
Take a photo of the top rear skirt showing both sides evenly. Have your assistant put some pressure on the seat while taking the picture.
Tips for the Best Photo Fit Results
- Get the camera lower than the bar edge when taking rear bar pictures showing the gap under the bar edge.
- Take several photos so you can select the best ones to match the sample pictures shown here.
- Use flash to minimize shadows and illuminate under the bars.
How to Submit Your Photo Fit
- Email your photos to specializedsaddles@gmail.com.
- If your photos are too large to attach to an email, you may upload them to Google Drive, Dropbox, or WeTransfer and email us the link instead.
- Please include your order number and horse information in your email.
Please allow 3–5 business days for your Photo Fit evaluation depending on seasonal volume.